> ## Documentation Index
> Fetch the complete documentation index at: https://docs.vatel.ai/llms.txt
> Use this file to discover all available pages before exploring further.
# AI Receptionist
> Deploy your first AI phone receptionist agent
Deploy your first AI phone receptionist agent in just a few minutes: it answers basic questions, handles call transfers, and can send emails.
Ideal for getting familiar with the Vatel platform.
## Prerequisites
Before creating your first agent, make sure you are logged into the platform and have at least one valid organization.
1. **User account** - Verify you are logged in. See [User Account](/core-concepts/account) if needed.
2. **Organization** - Verify you have at least one organization. See [Organization](/core-concepts/organization) if needed.
## 1. Create an agent
From the dashboard, create your first agent.
1. From the **Overview** tab (**Quick Actions**) or **Agents** tab, click **New Agent** and give it a name.
2. Once created you can duplicate, move to another organization, or delete the agent.
3. Click **Configure** to open the agent editor and define logic and behavior.
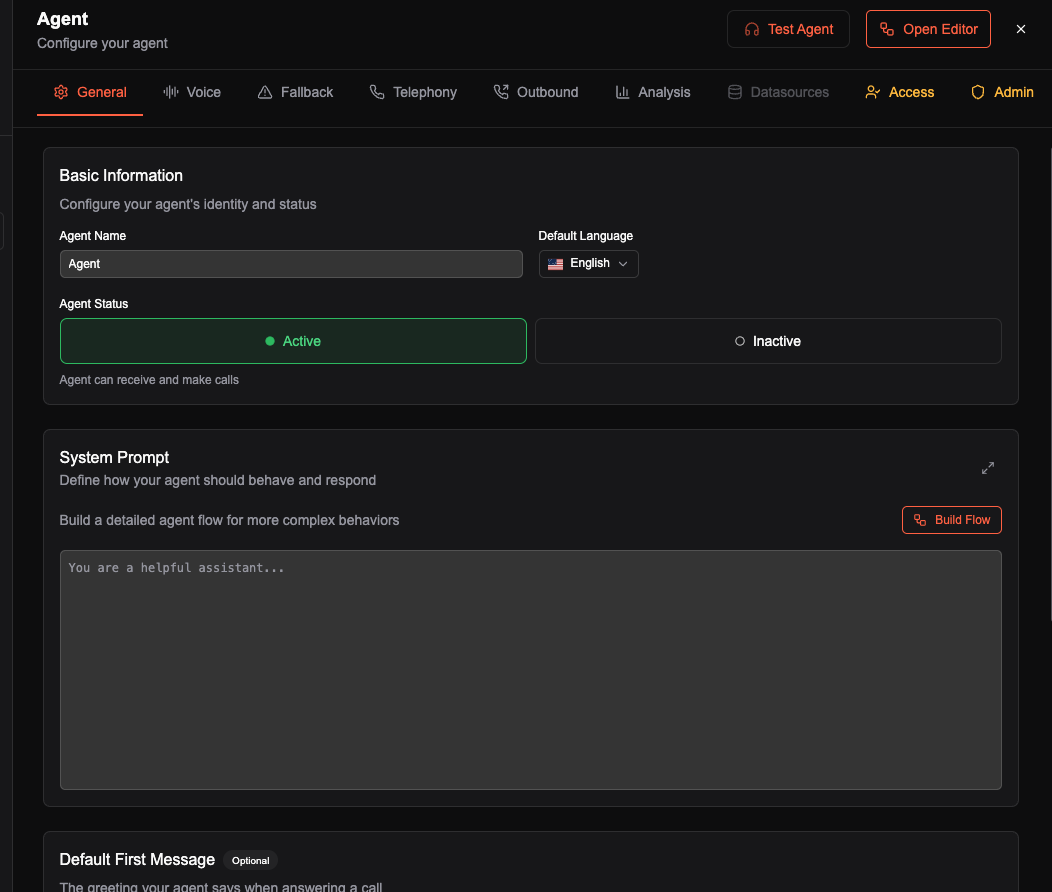
## 2. Add company context
Your agent needs **context** to answer customer questions correctly.
1. Copy the context text you want (e.g. company overview, services, contact info).
2. In **Agent Settings**, paste it into the **Context** box.
3. Click **Save**.
 For guidance on context, see [Prompt engineering](/configure/prompting).
## 3. Agent Editor Introduction
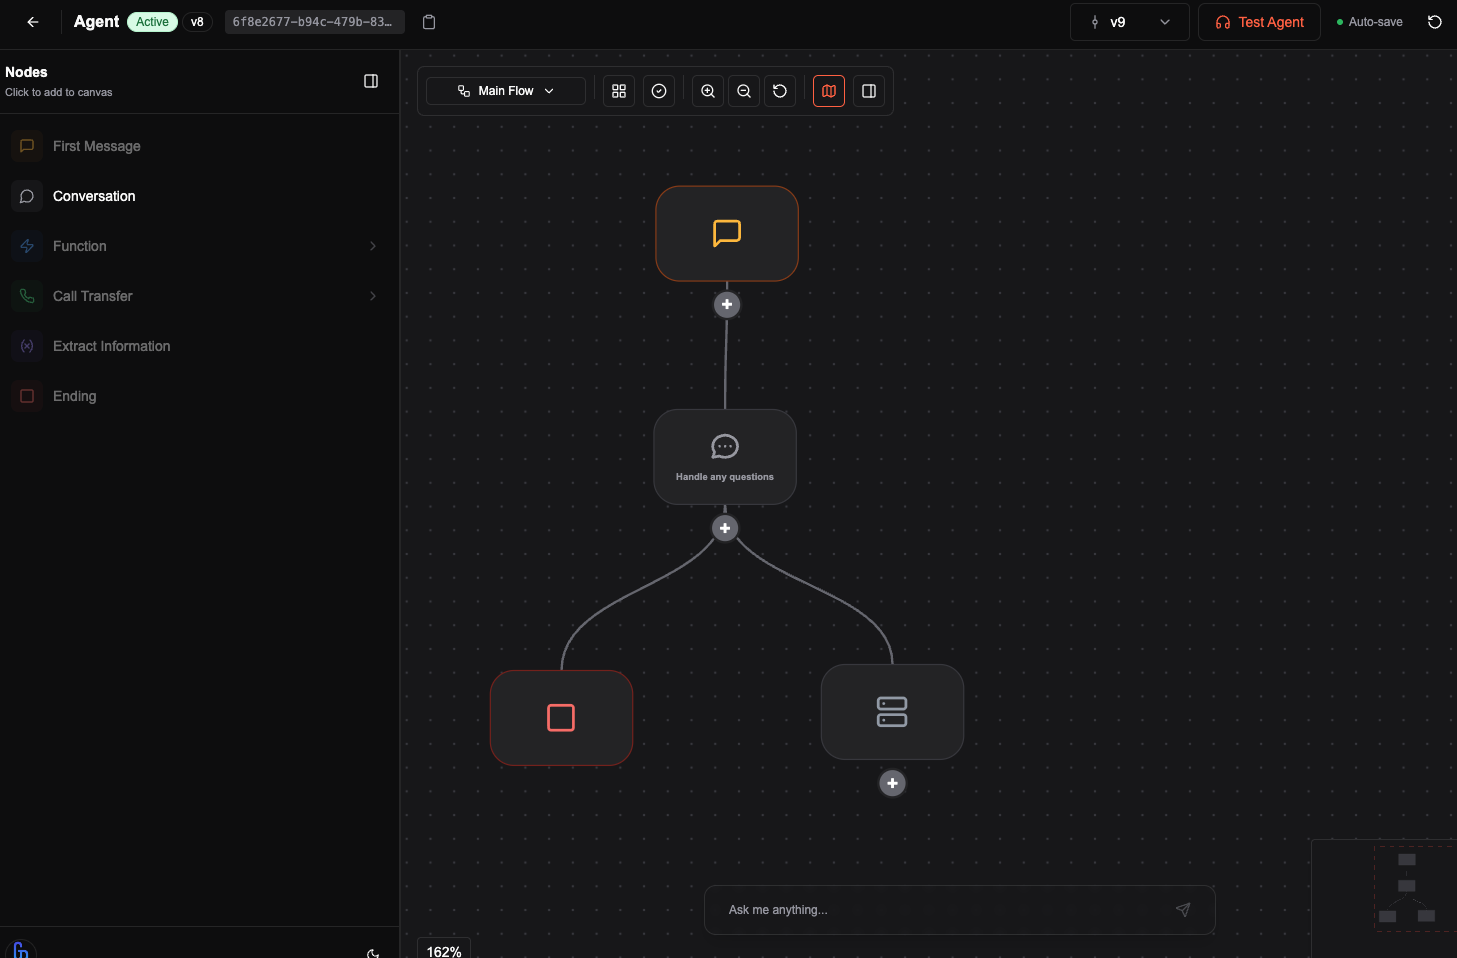
The **graph** defines the agent’s behavior. Each node is an action or decision.
1. **Welcome Message** - What the agent says first (e.g. “Hi! Thank you for calling. How can I help?”).
2. **Conversation** - Set a title (e.g. “General Questions”) and description that scopes the conversation.
3. **Transfer** - Set **When** (e.g. “client requests to be transferred”), **Phone Number**, and **Transfer Message**.
4. **End** - Set **When** (e.g. “client has no more requests”) and **Message**.
For guidance on context, see [Prompt engineering](/configure/prompting).
## 3. Agent Editor Introduction
The **graph** defines the agent’s behavior. Each node is an action or decision.
1. **Welcome Message** - What the agent says first (e.g. “Hi! Thank you for calling. How can I help?”).
2. **Conversation** - Set a title (e.g. “General Questions”) and description that scopes the conversation.
3. **Transfer** - Set **When** (e.g. “client requests to be transferred”), **Phone Number**, and **Transfer Message**.
4. **End** - Set **When** (e.g. “client has no more requests”) and **Message**.
 Details: [Agent Editor](/configure/agent-editor).
## 4. Test the agent
1. Click **Version: Draft** → **Create New Version**.
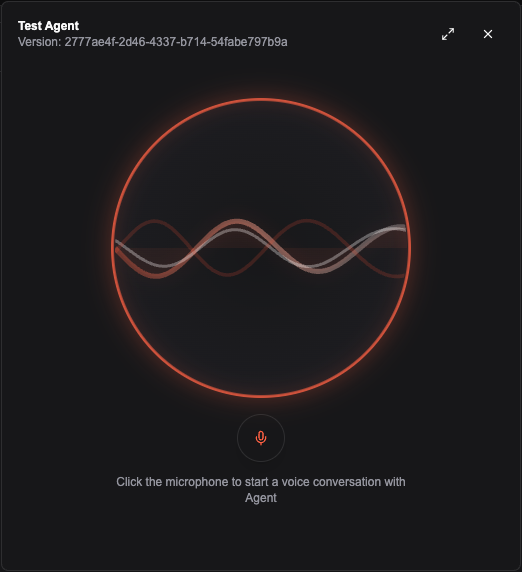
2. Click **Test Agent** → **Start Conversation** to simulate a call.
Details: [Agent Editor](/configure/agent-editor).
## 4. Test the agent
1. Click **Version: Draft** → **Create New Version**.
2. Click **Test Agent** → **Start Conversation** to simulate a call.
 3. Use **Call History** to review and analyze the call. See [Call Analysis](/core-concepts/call-analysis).
## 5. Deploy the agent
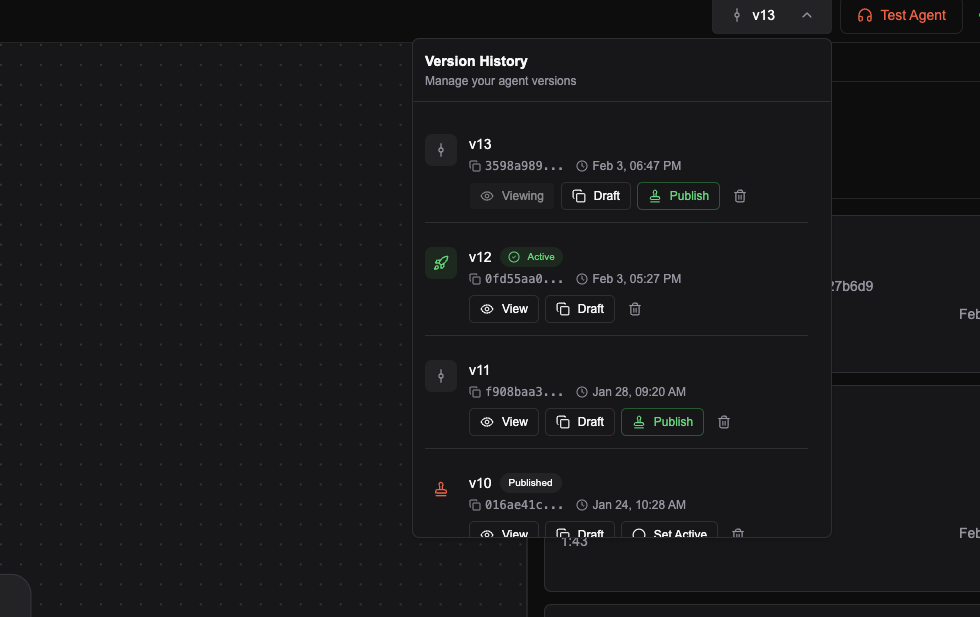
1. **Publish** - In the agent editor, open **Version**, select the version (e.g. v1), click **Publish** then **Set Active**.
2. **Assign a number** - In **Settings → Call Settings**, select a phone number you’ve added and click **Assign**.
3. Use **Call History** to review and analyze the call. See [Call Analysis](/core-concepts/call-analysis).
## 5. Deploy the agent
1. **Publish** - In the agent editor, open **Version**, select the version (e.g. v1), click **Publish** then **Set Active**.
2. **Assign a number** - In **Settings → Call Settings**, select a phone number you’ve added and click **Assign**.
 **Congratulations.** Your agent is in production and ready to receive real calls on the assigned number.
## 6. Add email sending (optional)
Add a email integration from the [integrations](/integrations/overview) page to send a summary after each call.
At the time of writing, MailerSend, Resend and Sendgrid integrations are supported.
1. In the agent, go to **Go to End Flow** in the graph editor.
**Congratulations.** Your agent is in production and ready to receive real calls on the assigned number.
## 6. Add email sending (optional)
Add a email integration from the [integrations](/integrations/overview) page to send a summary after each call.
At the time of writing, MailerSend, Resend and Sendgrid integrations are supported.
1. In the agent, go to **Go to End Flow** in the graph editor.
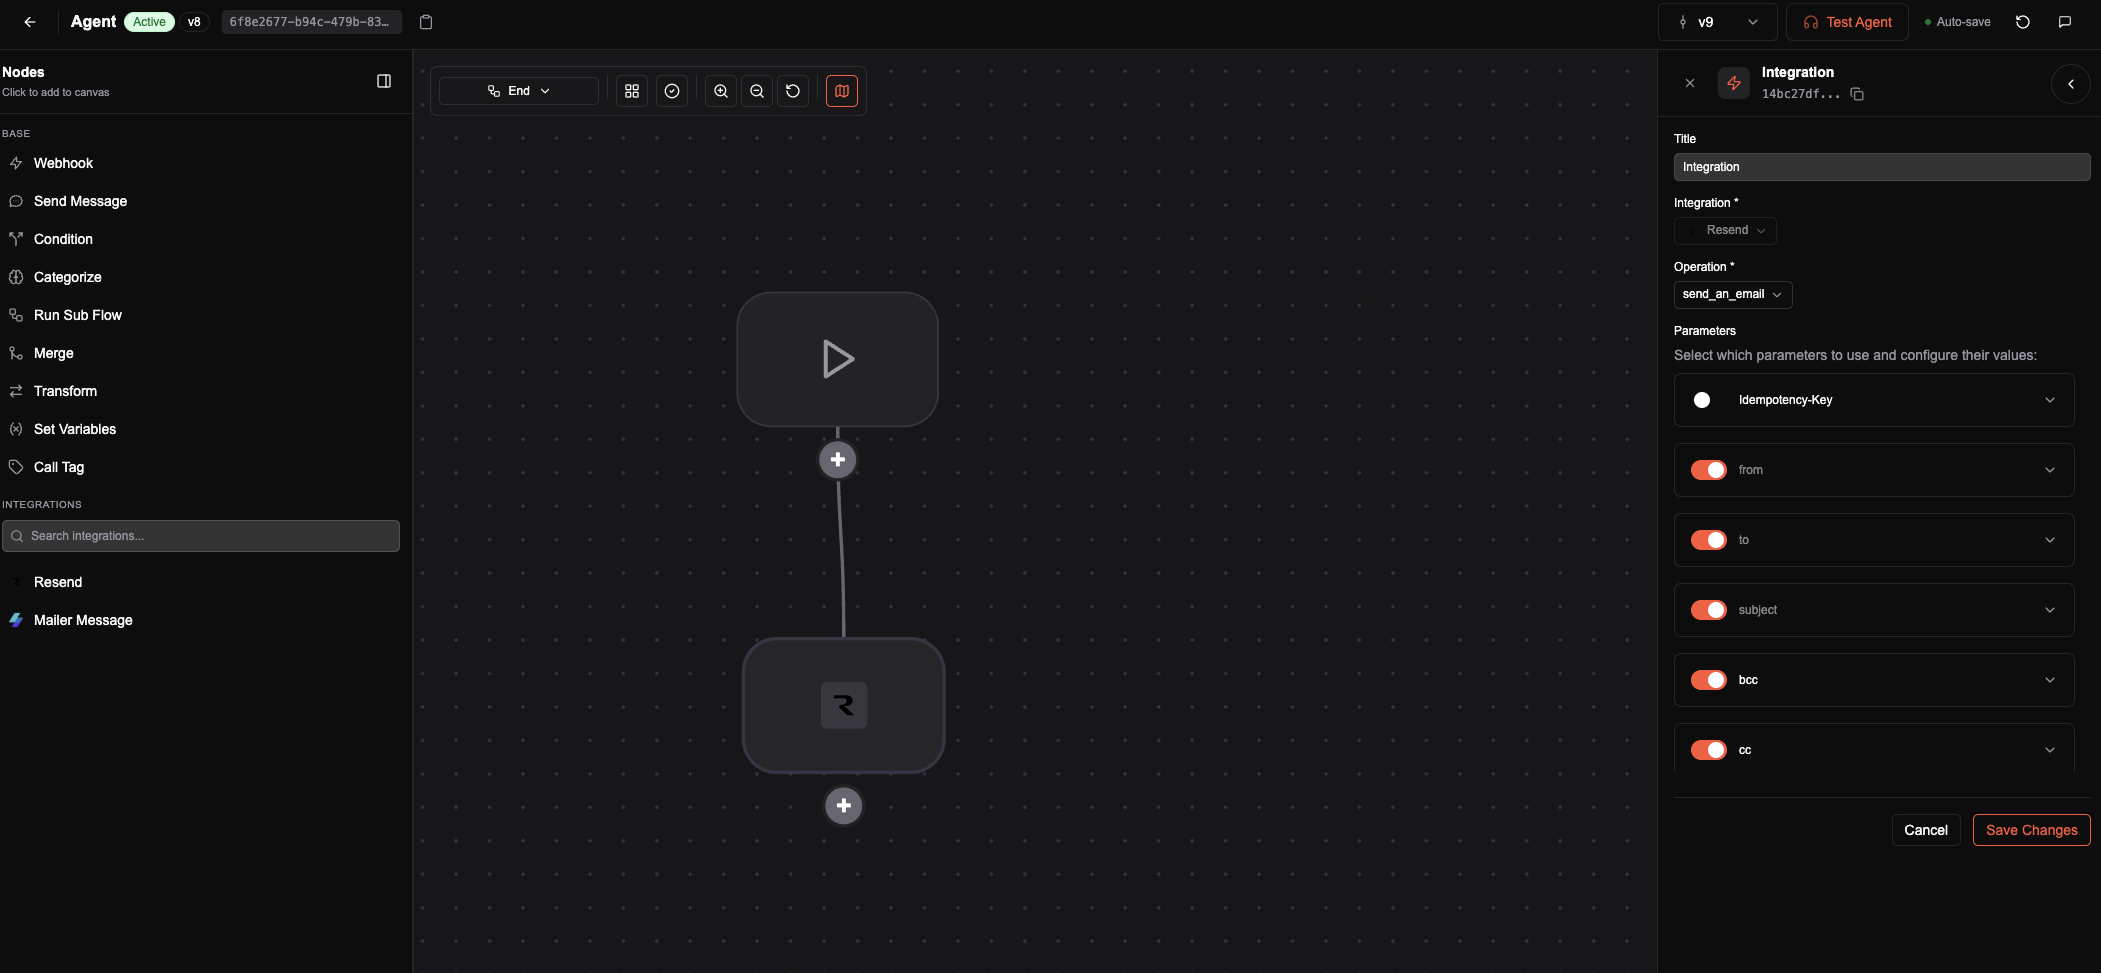 2. Add a email integration from the [integrations](/integrations/overview) page and set **Sender**, **Recipients**, **Subject**, and **Body** (you can use [system variables](/core-concepts/system-vars) like `{{call_summary}}`, `{{caller}}`, `{{duration}}`).
3. Enable call summary in **Settings → Post-Call Analysis** if you use `{{call_summary}}`.
2. Add a email integration from the [integrations](/integrations/overview) page and set **Sender**, **Recipients**, **Subject**, and **Body** (you can use [system variables](/core-concepts/system-vars) like `{{call_summary}}`, `{{caller}}`, `{{duration}}`).
3. Enable call summary in **Settings → Post-Call Analysis** if you use `{{call_summary}}`.