> ## Documentation Index
> Fetch the complete documentation index at: https://docs.vatel.ai/llms.txt
> Use this file to discover all available pages before exploring further.
# Salesforce APIs
> Connect Salesforce to your Vatel agents using JWT Bearer authentication
The **Salesforce APIs** integration lets your agents access and manage records, cases, leads, and other objects in your Salesforce org.
## Prerequisites
* A **Salesforce account** with admin access - [Sign up](https://www.salesforce.com)
* A **Vatel AI organization** and at least **one agent**
## Configuration
### Step 1: Open Salesforce Setup
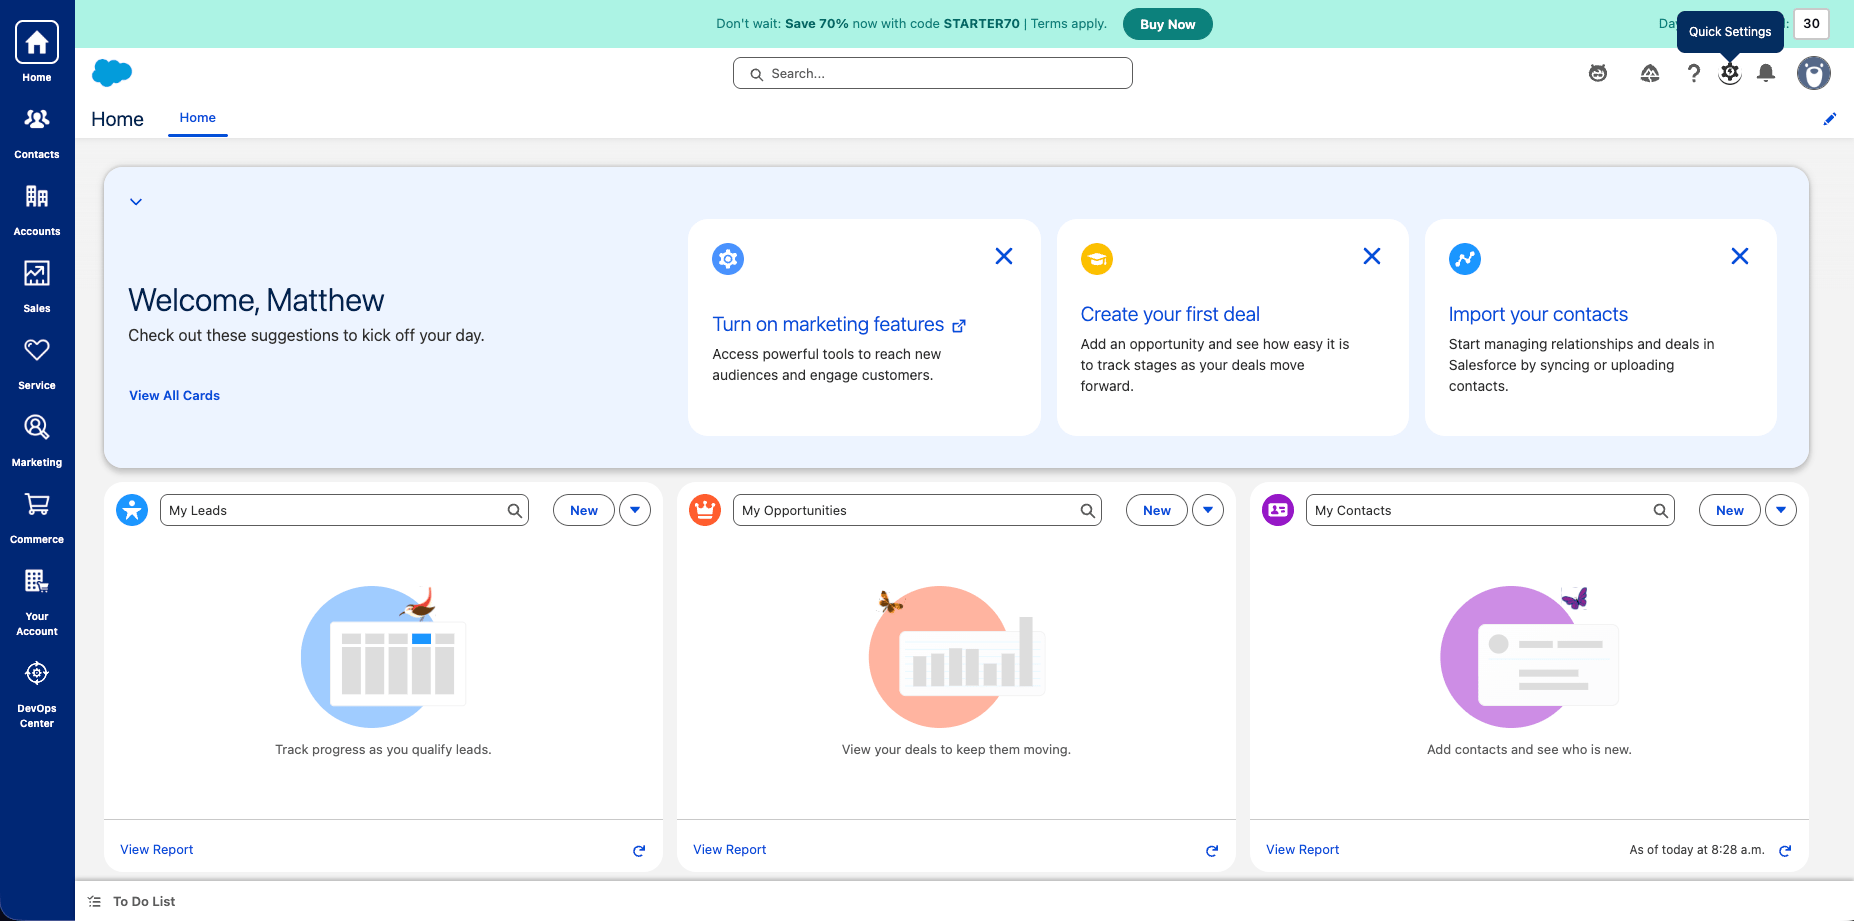
1. Log in to your Salesforce account.
2. Click the **gear icon** in the top-right corner to open **Setup**.
 ### Step 2: Create an External Client App
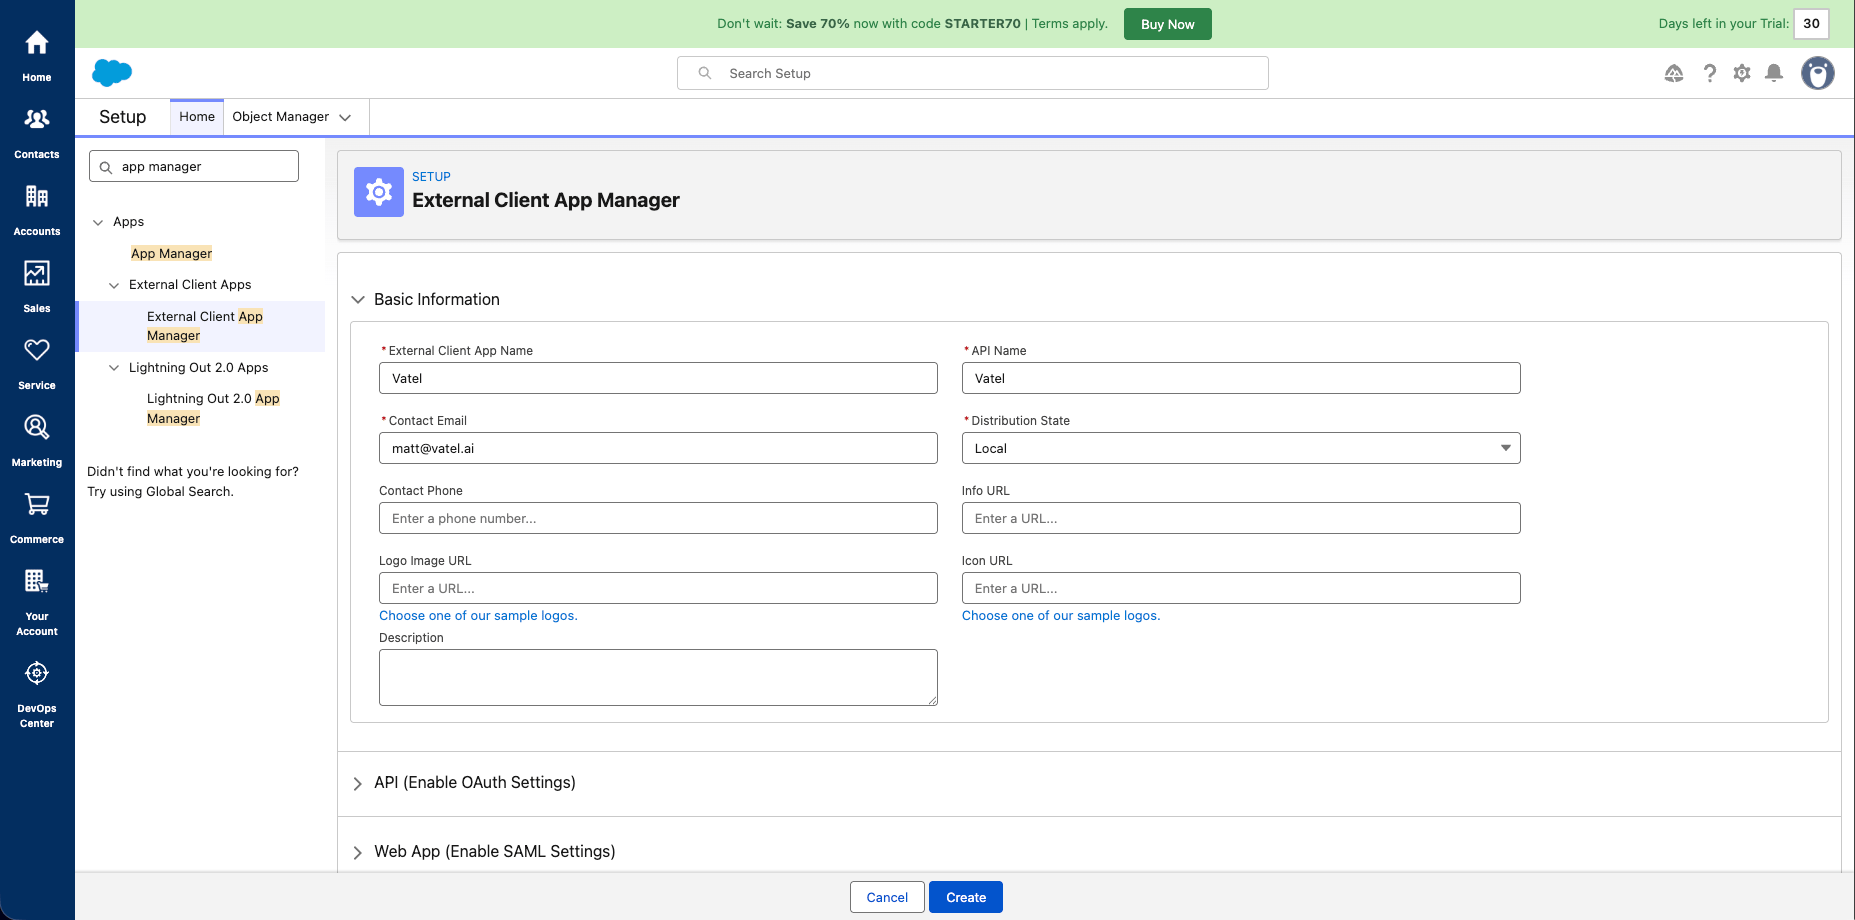
1. In the Setup search bar, type **App Manager** and select **External Client App Manager** from the left sidebar results.
2. Click **New External Client App**.
3. Fill in the **Basic Information** fields: give the app a name (e.g. `Vatel`), an API name, and a contact email.
### Step 2: Create an External Client App
1. In the Setup search bar, type **App Manager** and select **External Client App Manager** from the left sidebar results.
2. Click **New External Client App**.
3. Fill in the **Basic Information** fields: give the app a name (e.g. `Vatel`), an API name, and a contact email.
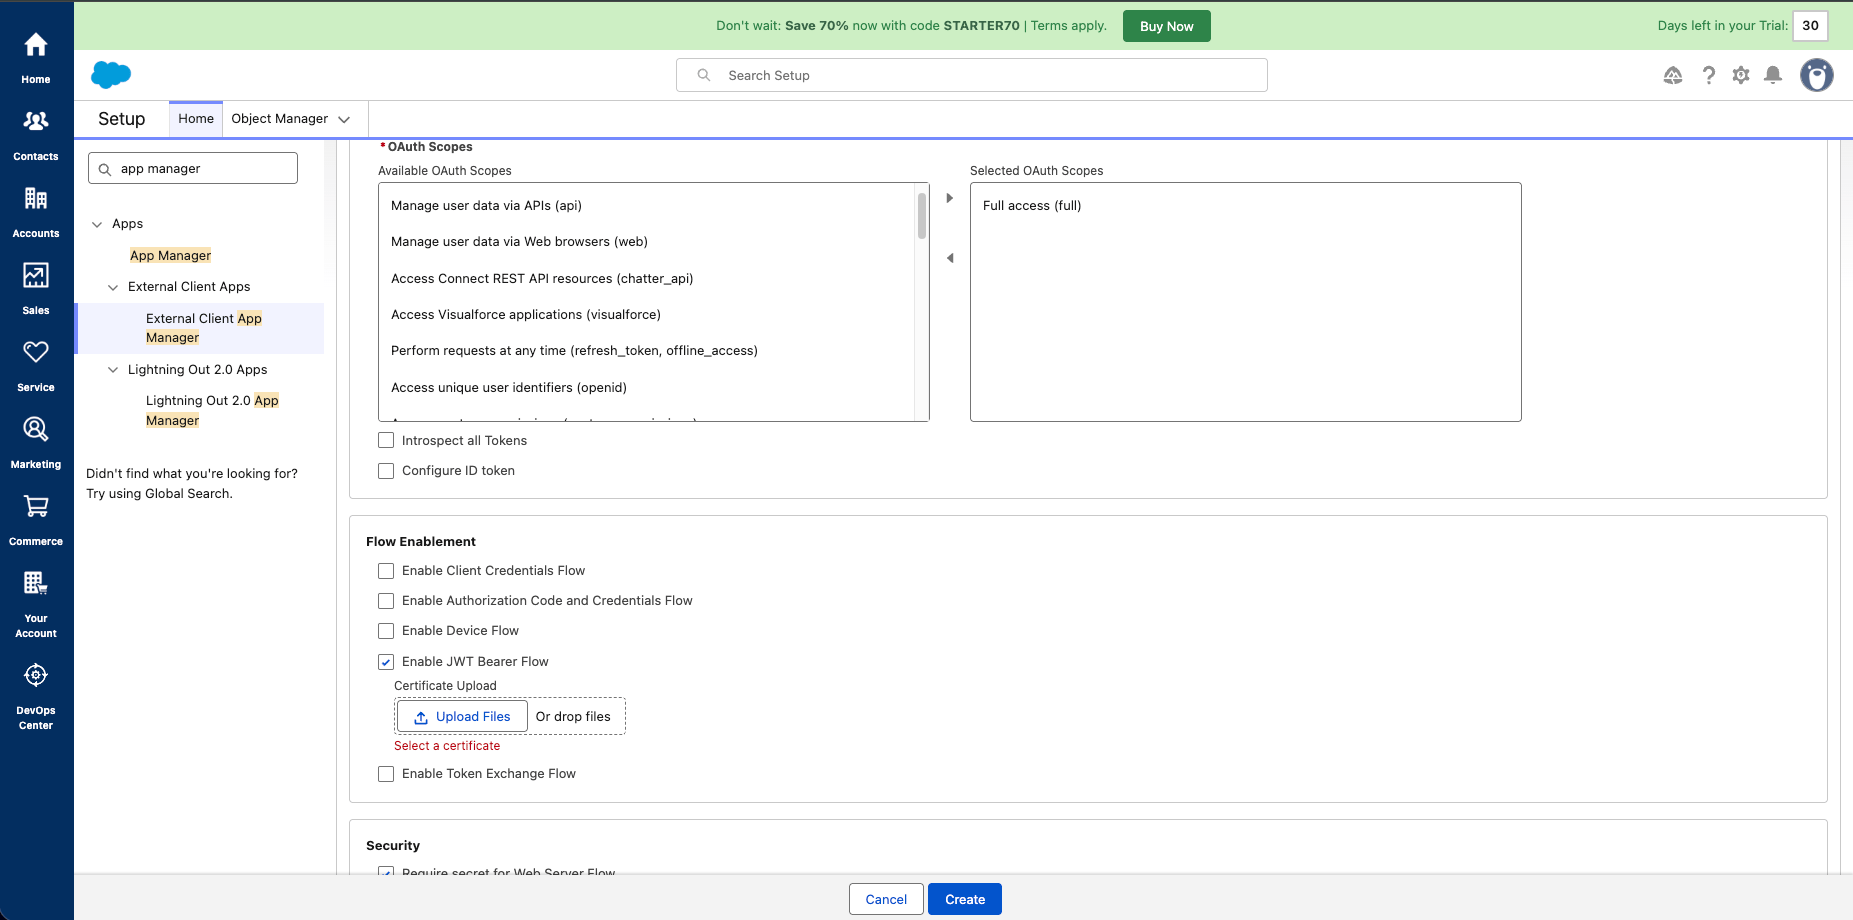
 4. Scroll down to the **OAuth Scopes** section and add the scopes your use case requires (e.g. **Full access**).
5. Scroll to the **Flow Enablement** section and check **Enable JWT Bearer Flow**.
6. Under **Certificate Upload**, upload your SSL certificate (`.crt` file). This is the public certificate paired with the private key you will use to sign JWTs.
7. Click **Create**.
4. Scroll down to the **OAuth Scopes** section and add the scopes your use case requires (e.g. **Full access**).
5. Scroll to the **Flow Enablement** section and check **Enable JWT Bearer Flow**.
6. Under **Certificate Upload**, upload your SSL certificate (`.crt` file). This is the public certificate paired with the private key you will use to sign JWTs.
7. Click **Create**.
 ### Step 3: Get Your Consumer Key and Generate a Bearer Token
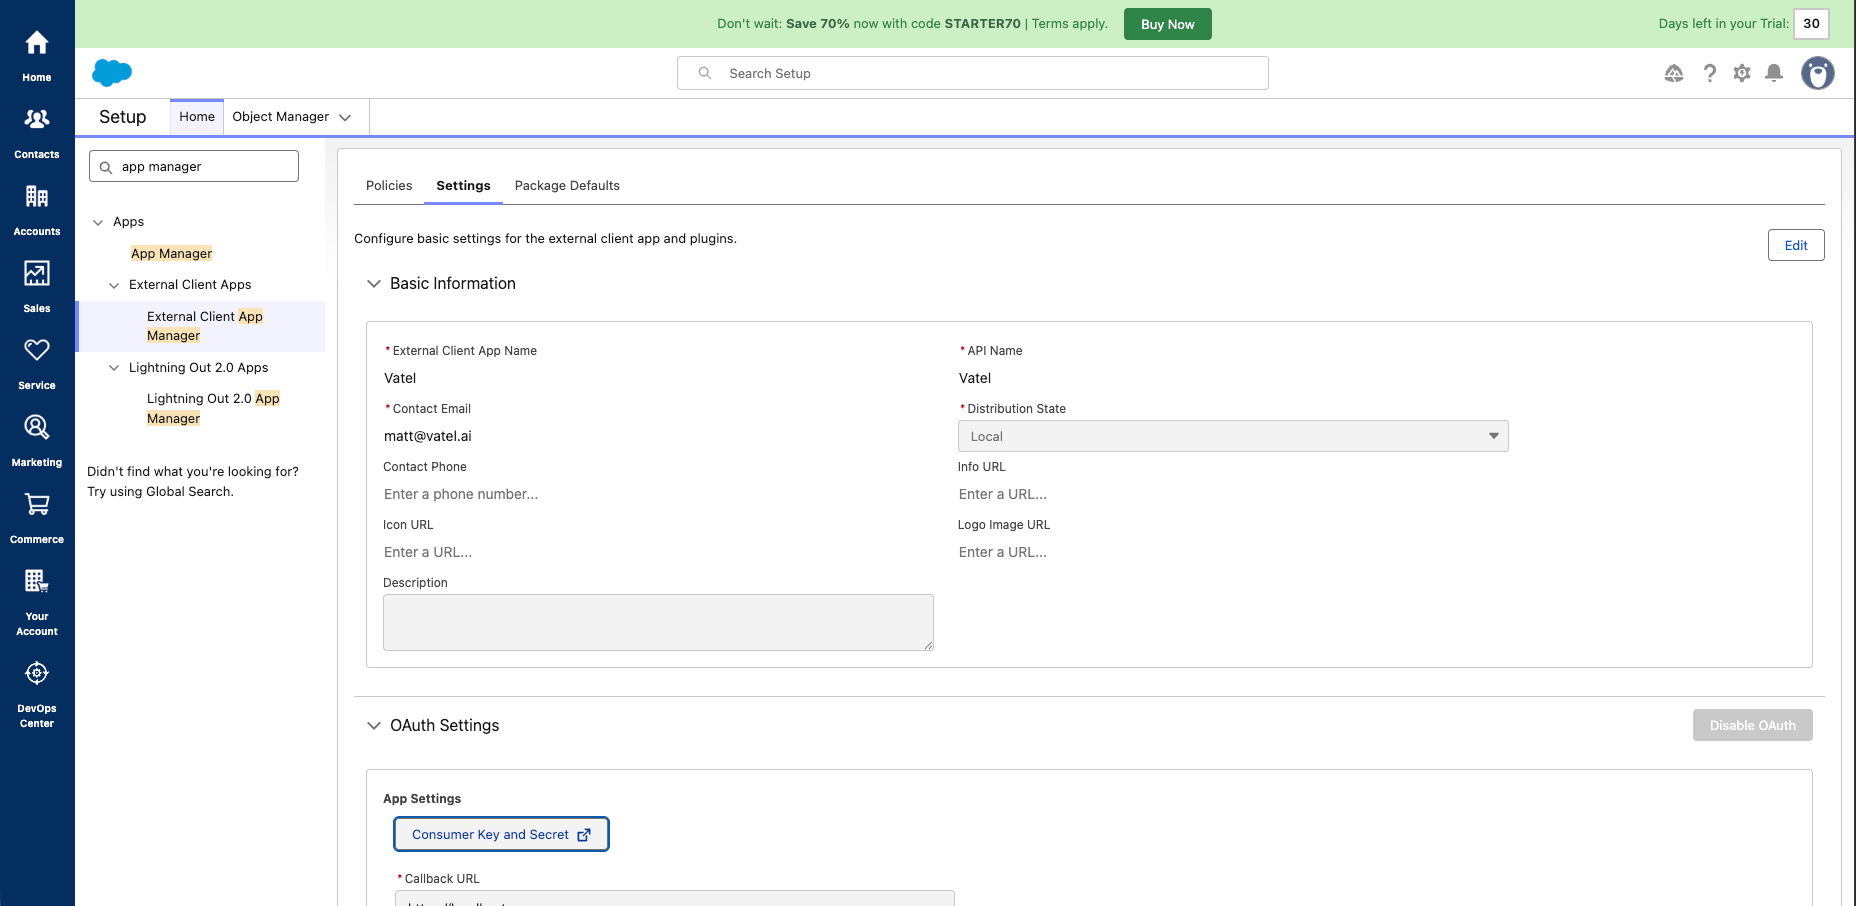
1. After creating the app, open it and click the **Settings** tab.
2. Click **Consumer Key and Secret** to view your credentials. Copy the **Consumer Key** (also called the client ID).
### Step 3: Get Your Consumer Key and Generate a Bearer Token
1. After creating the app, open it and click the **Settings** tab.
2. Click **Consumer Key and Secret** to view your credentials. Copy the **Consumer Key** (also called the client ID).
 3. Use your **Consumer Key**, your Salesforce **username**, and your **private key** to generate a signed JWT and exchange it for an access token. Follow the [Salesforce JWT Bearer Token flow guide](https://developer.salesforce.com/docs/service/messaging-byoc-ccaas/guide/generate-token.html) for the full token generation steps.
4. Copy the **access token** returned from the token endpoint. This is the bearer token you will paste into Vatel.
### Step 4: Connect the integration in Vatel
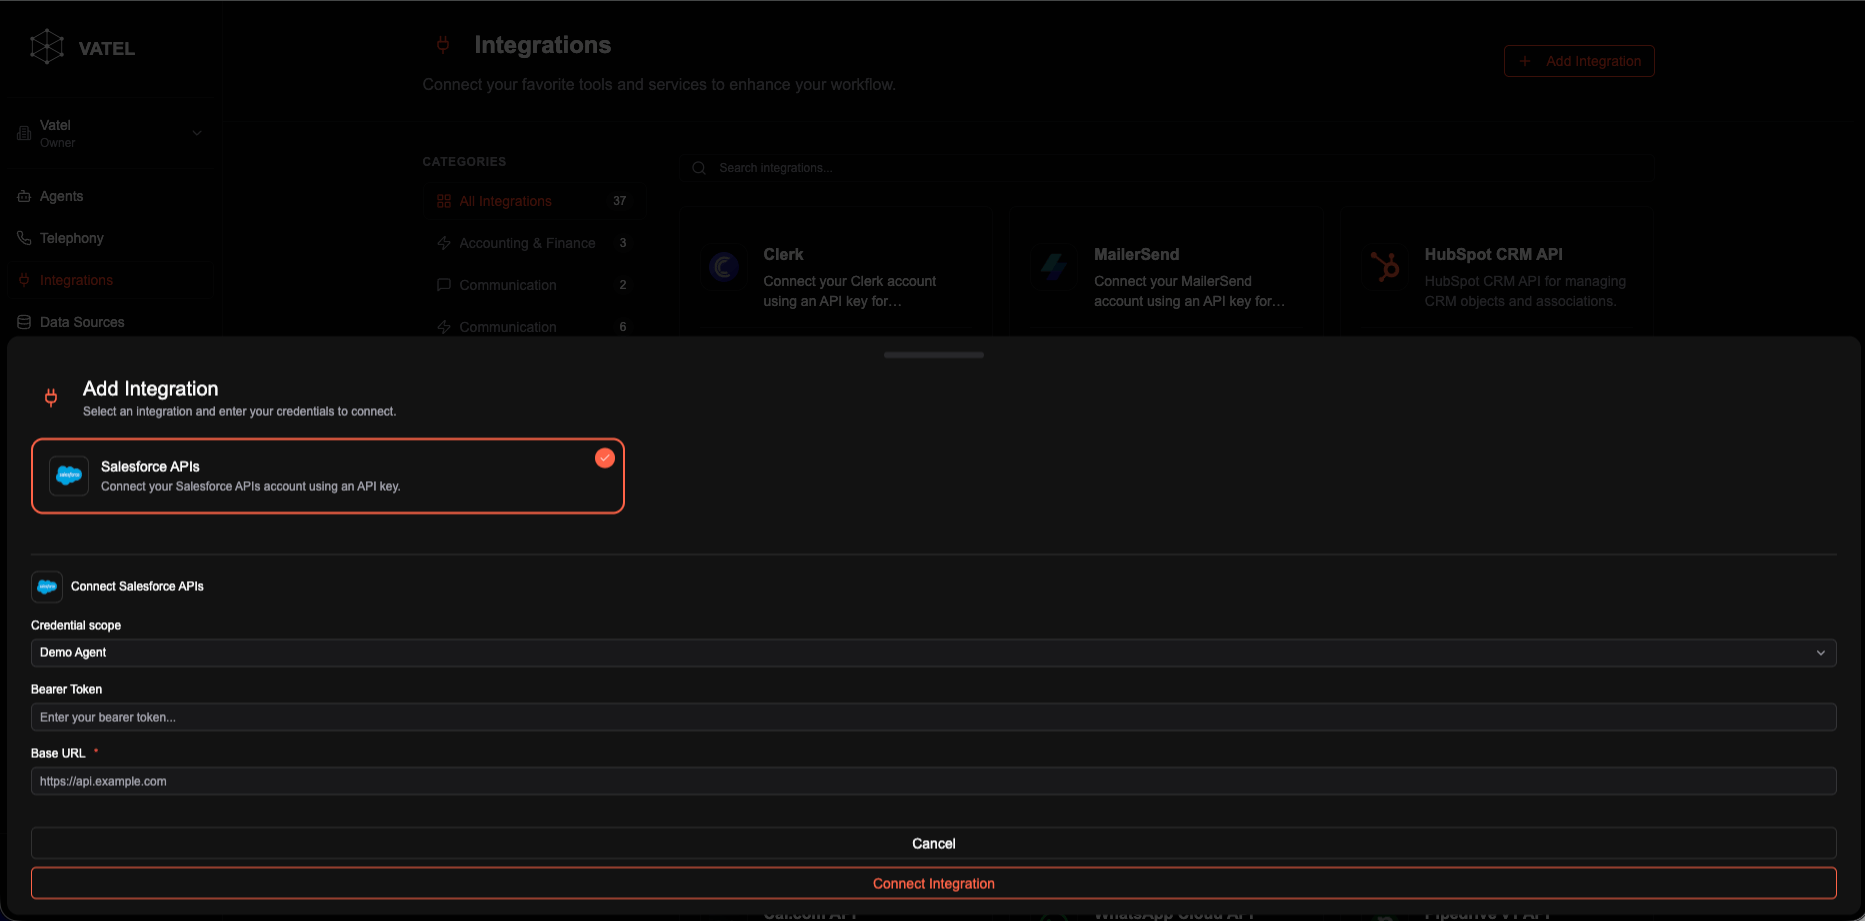
1. In the Vatel sidebar, click **Integrations**.
2. Click **Add Integration** in the top-right.
3. Select **Salesforce APIs**.
4. Set **Credential scope** to **Organization-wide (all agents)** or restrict it to a specific agent.
5. Paste your access token into the **Bearer Token** field.
6. Enter your Salesforce instance URL in the **Base URL** field (e.g. `https://yourorg.my.salesforce.com`).
7. Click **Connect Integration**.
3. Use your **Consumer Key**, your Salesforce **username**, and your **private key** to generate a signed JWT and exchange it for an access token. Follow the [Salesforce JWT Bearer Token flow guide](https://developer.salesforce.com/docs/service/messaging-byoc-ccaas/guide/generate-token.html) for the full token generation steps.
4. Copy the **access token** returned from the token endpoint. This is the bearer token you will paste into Vatel.
### Step 4: Connect the integration in Vatel
1. In the Vatel sidebar, click **Integrations**.
2. Click **Add Integration** in the top-right.
3. Select **Salesforce APIs**.
4. Set **Credential scope** to **Organization-wide (all agents)** or restrict it to a specific agent.
5. Paste your access token into the **Bearer Token** field.
6. Enter your Salesforce instance URL in the **Base URL** field (e.g. `https://yourorg.my.salesforce.com`).
7. Click **Connect Integration**.
 ### Step 5: Use the integration in your agent graph
1. Open an agent and go to its graph editor.
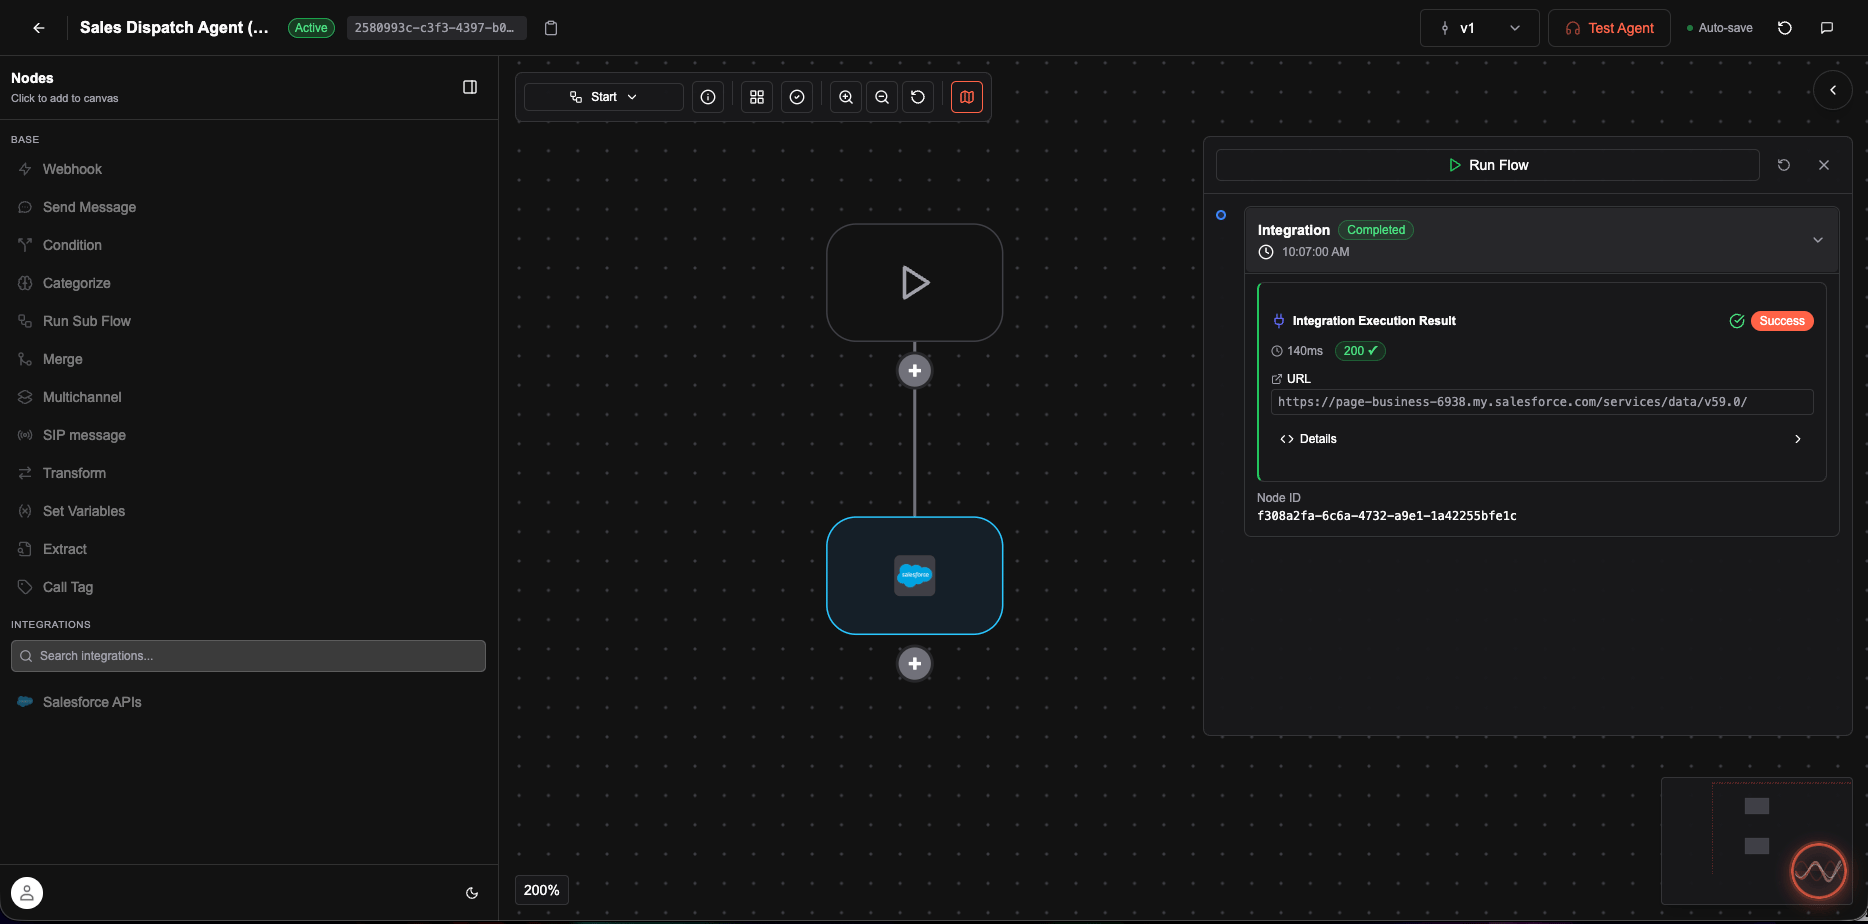
2. In the left sidebar under **Integrations**, you will see **Salesforce APIs** listed. Click it to add it as a node.
3. In the node panel that opens on the right, give the node a **Title**, then select an **Operation** from the dropdown.
4. Fill in any relevant field values or map them from graph variables.
5. Click **Save Changes**.
6. Start a call to test the node in your agent flow.
### Step 5: Use the integration in your agent graph
1. Open an agent and go to its graph editor.
2. In the left sidebar under **Integrations**, you will see **Salesforce APIs** listed. Click it to add it as a node.
3. In the node panel that opens on the right, give the node a **Title**, then select an **Operation** from the dropdown.
4. Fill in any relevant field values or map them from graph variables.
5. Click **Save Changes**.
6. Start a call to test the node in your agent flow.