
1. Create a generic SIP trunk with inbound credentials
In Vatel AI, create a SIP trunk and choose the Generic PBX type so you get a standard trunk without a vendor-specific workflow. Set the trunk region to match the hostname you will give Cekura. Under inbound authentication, use Digest and set a username and password. Cekura will authenticate with these when it sends calls to your trunk. You can leave outbound credentials unset (blank or “no credentials”) for this flow unless your environment specifically needs outbound authentication.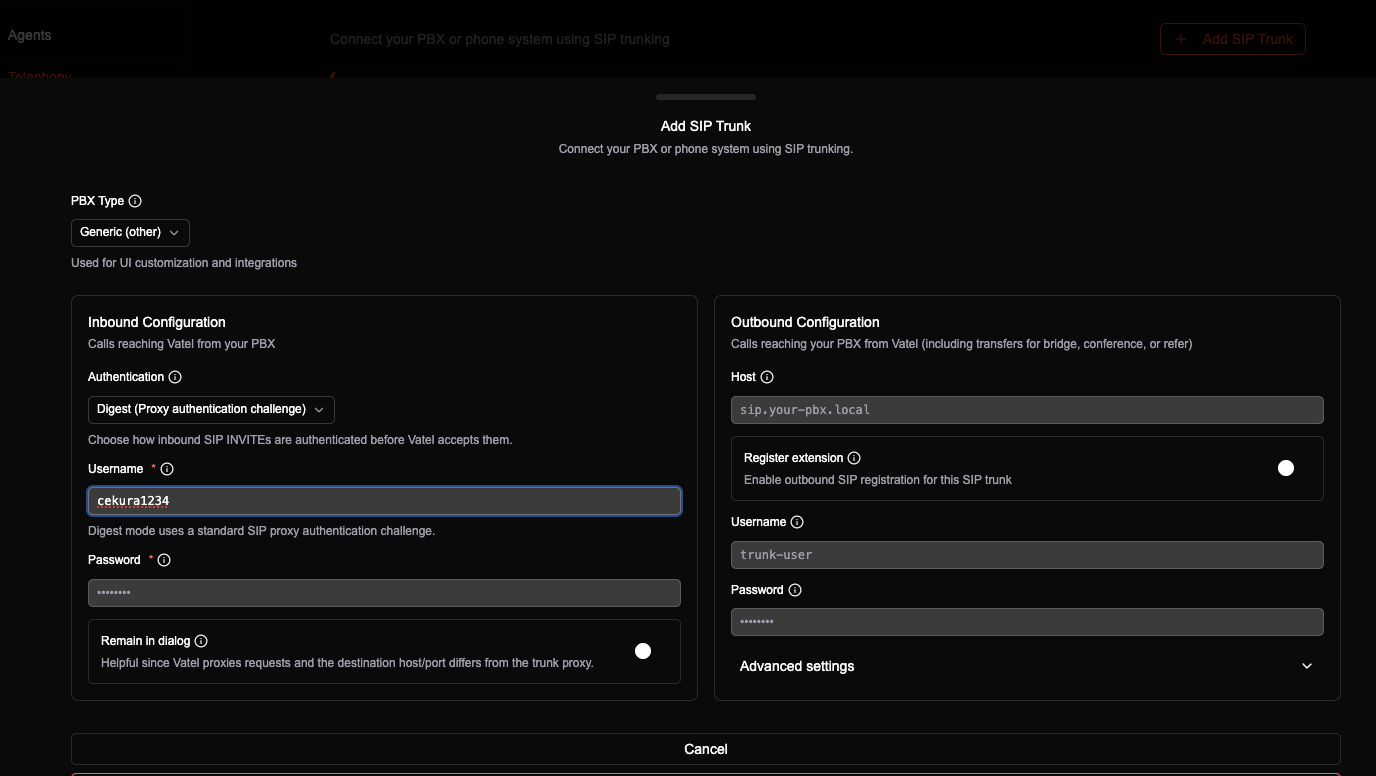
2. Assign an agent and copy the SIP URI
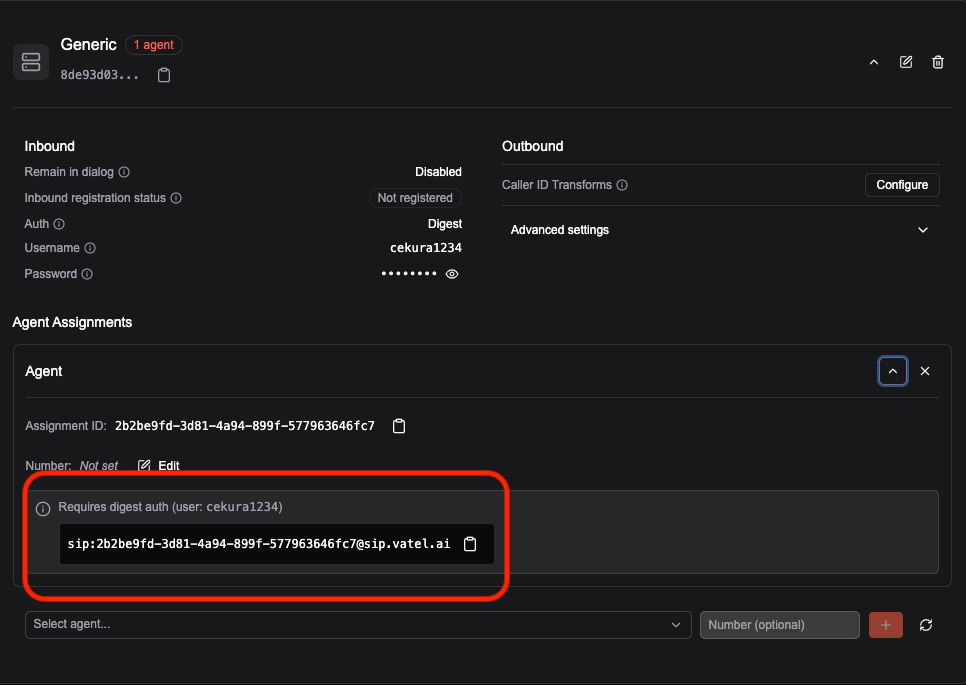
Add an agent assignment on the trunk and pick the agent you want Cekura to reach. After the assignment is saved, copy the SIP URI shown for that assignment. This is the address Cekura should use as the destination for calls to that agent. Use the hostname that matches the trunk region (for example sip:(assignment-id)@us-central1.sip.vatel.ai or sip:(assignment-id)@northamerica-northeast1.sip.vatel.ai).sip.vatel.ai is a convenience alias for US Central, not a third region.
3. Paste the trunk details into Cekura
In Cekura, open the evaluation agent that should place calls over SIP and go to the SIP / voice connection section. Enter the username, password, and SIP URI from Vatel exactly as you copied them so Cekura registers or places calls against your trunk the same way your PBX would.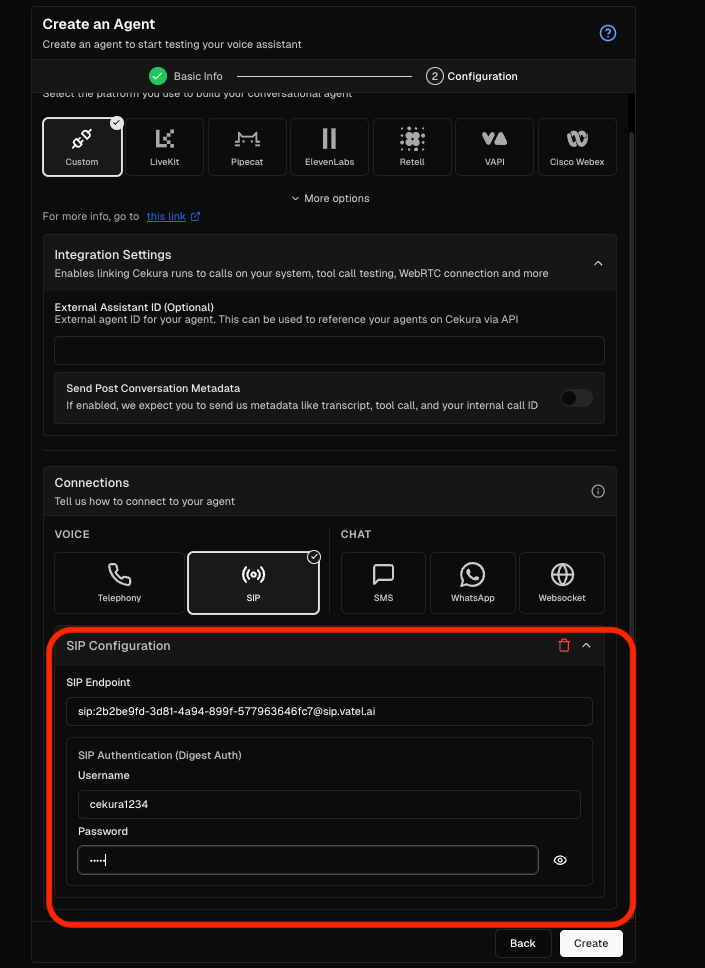
4. Run a SIP evaluation
Start a SIP (voice) evaluation run in Cekura so it dials the URI using your trunk credentials and connects to the assigned Vatel agent.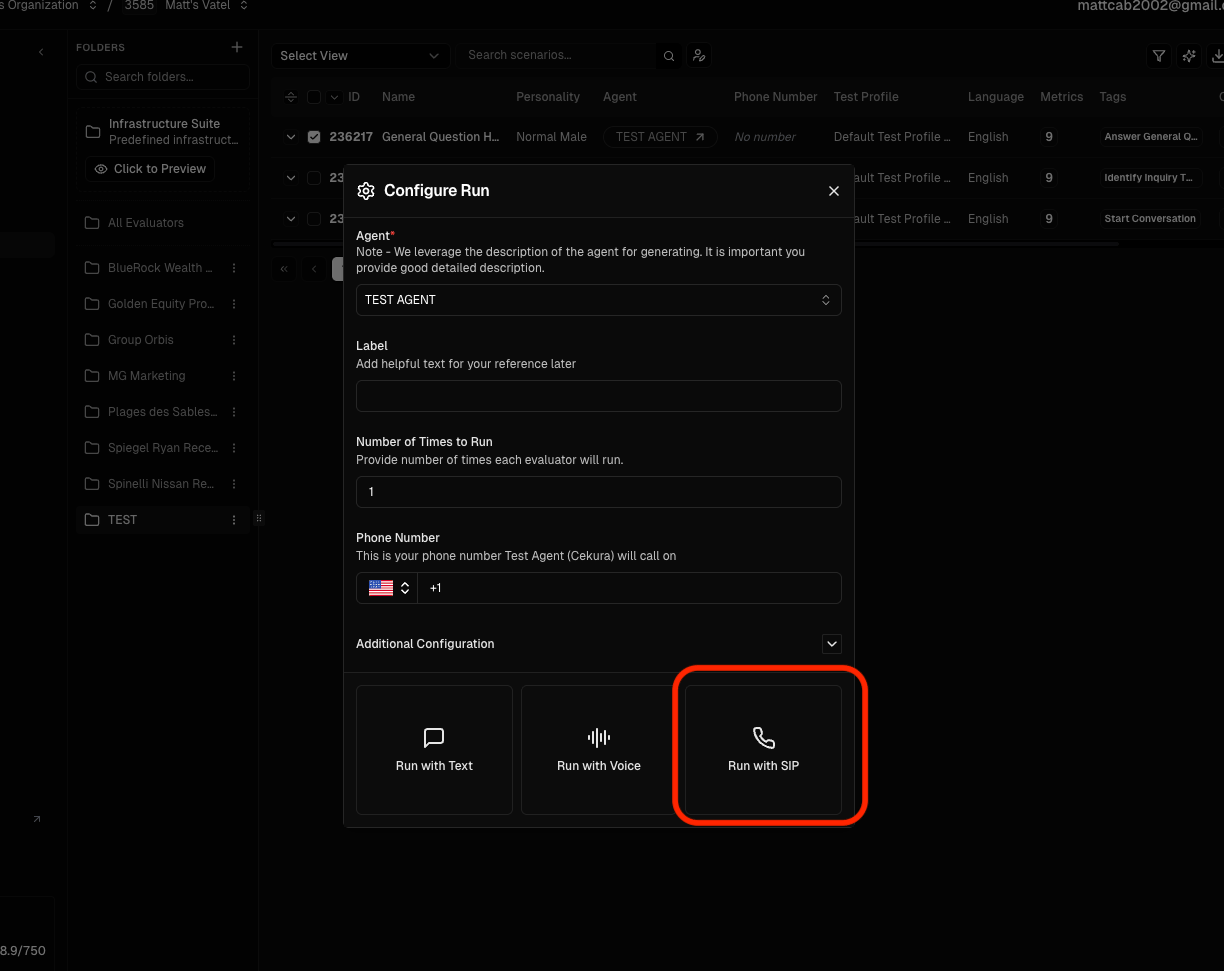
5. View the results
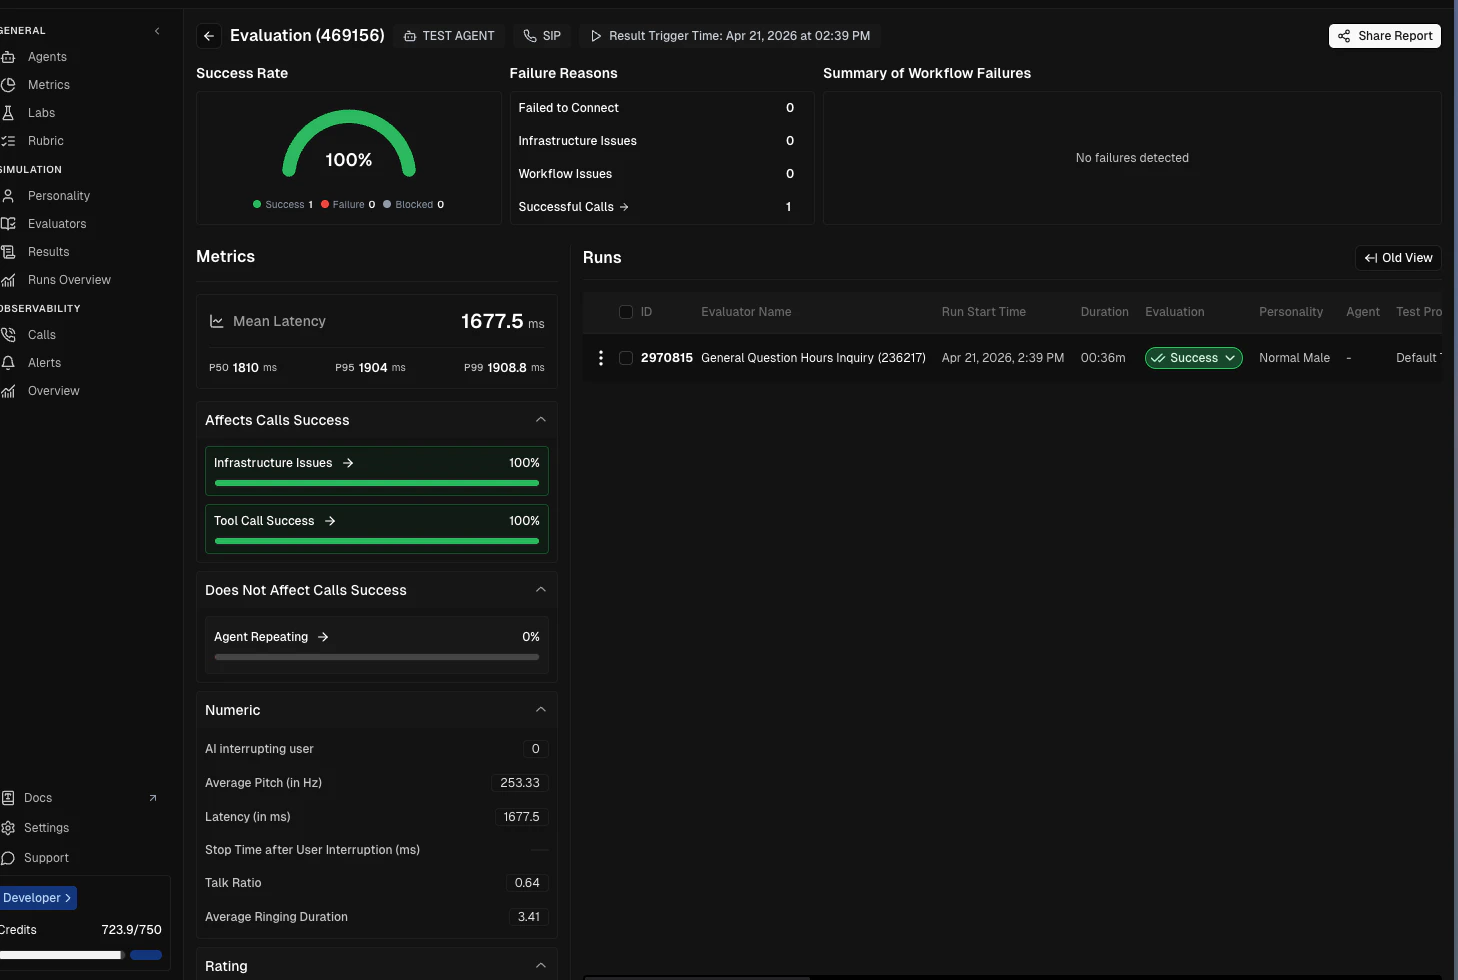
When the call completes, open Cekura’s results view to review audio, transcripts if available, and any evaluation output for that SIP run.